A fence made of brick and corrugated board has a beautiful appearance and protects the territory well. Both materials are distinguished by their strength and durability, so such structures are in great demand for fencing private houses. If you have the skills of welding and brickwork, such a fence can be made by hand.
Varieties of fences
Fences made of bricks and profiled sheets can have different designs. Sometimes they are decorated with forged elements, caps and other details. Examples of such constructions:
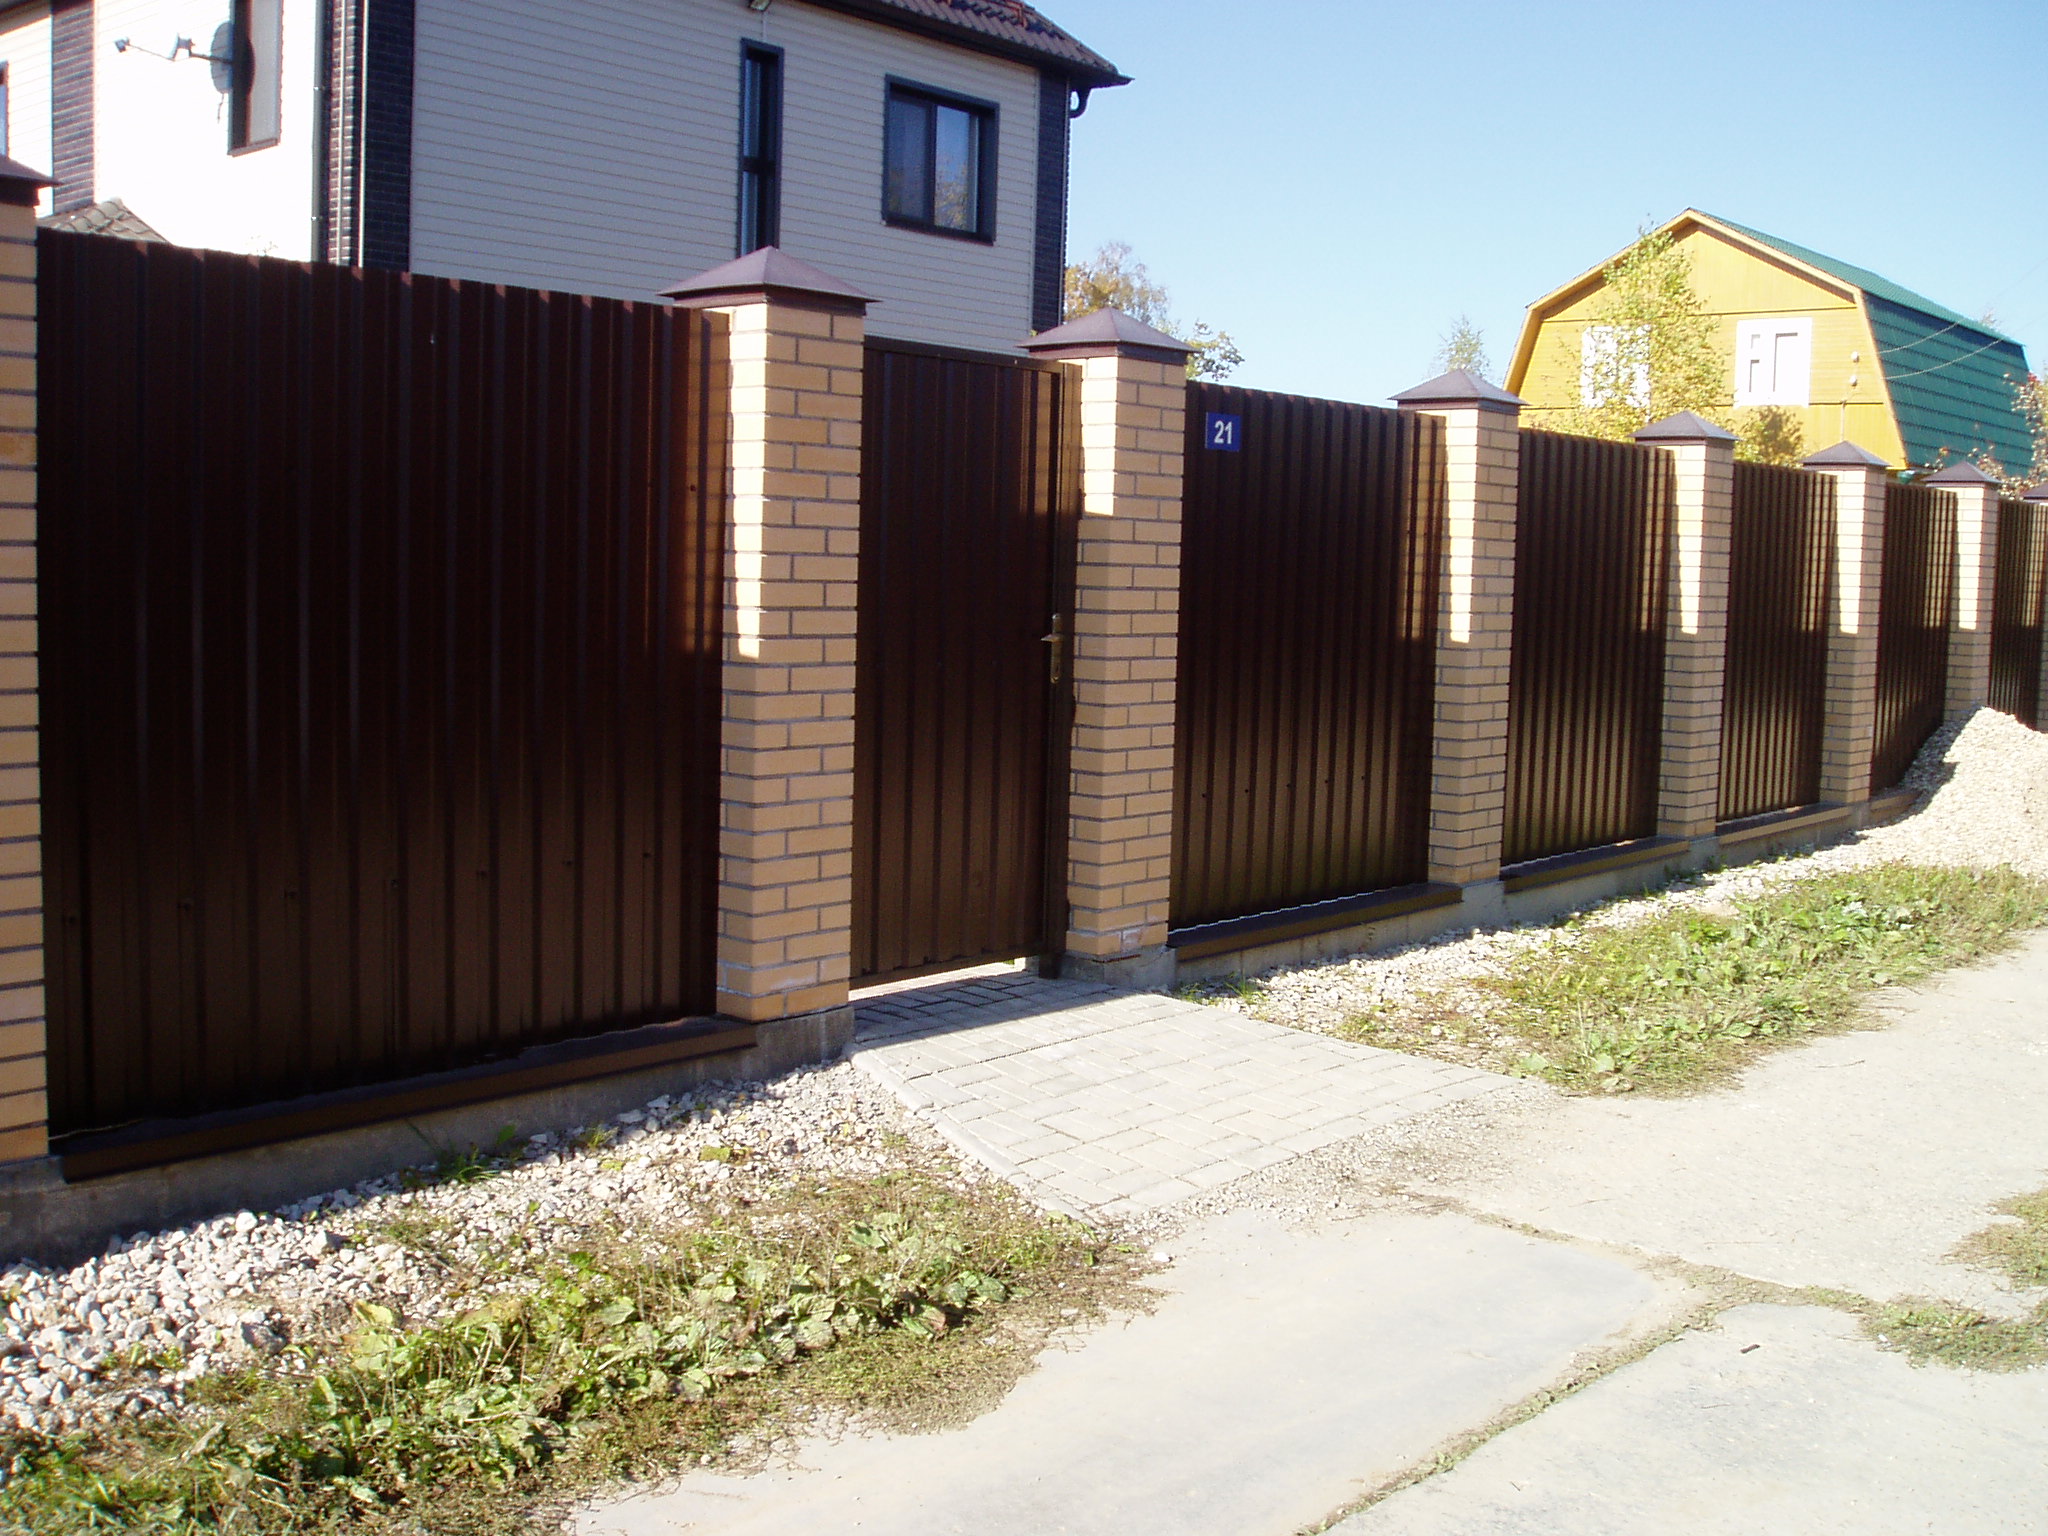
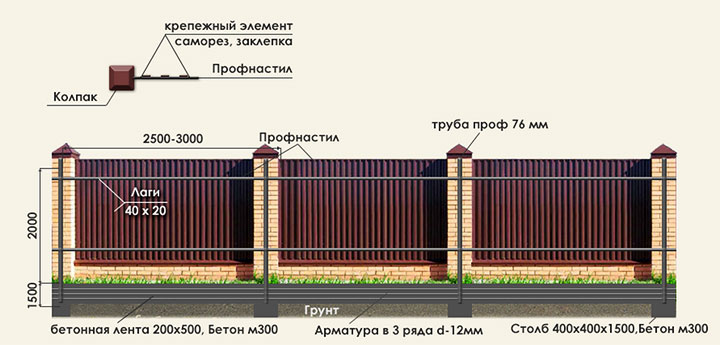
- Fencing with brick posts is definitely the leader in popularity. Traditionally, it consists of supports made of bricks, between which inserts from a profiled sheet are mounted. They are fixed to cross members made from corner or pipe sections. If the distance between the posts is large, the metal frame for the corrugated board must be strengthened by means of additional vertical posts and other elements that give rigidity. Sheets can be fixed solid without gaps or holes can be left.
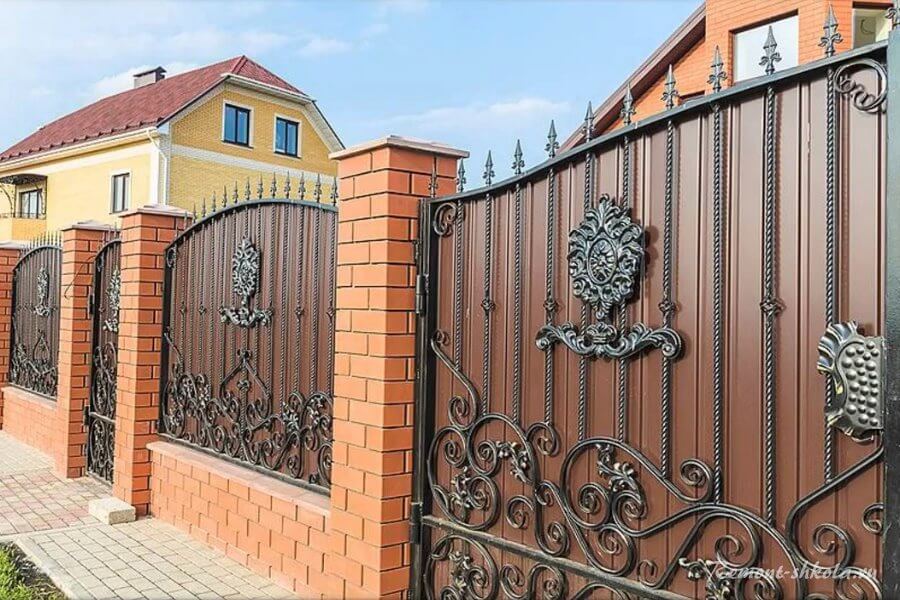
- A fence with openwork forging of a semicircular shape. The design will look elegant and at the same time reliably protect against intrusion by strangers.
- Fence with forged elements at the top. In terms of financial costs, this is a more affordable option than the previous one, which involves the use of forged parts throughout the entire floor area.
There are other ways to make your design more interesting. For sections, you can use a professional sheet of different shades - from gray and other calm options to bright and juicy. The shape of the pillars can also be different - round, four- and even hexagonal. Sometimes a combination of several shades of bricks is used. Light silicate products have good aesthetic qualities. Sometimes in some bricks they make notches, cut corners, change their shape. You can diversify the appearance of the structure with ornamental masonry.
On the top of the posts, you can put on special metal caps that protect against moisture. They can have different colors, smooth or embossed surface. Above all or several sections, you can mount canopies made of profiled sheet.
Advantages and disadvantages of the design
Since the fence made of profiled sheet with brick pillars has many design options, when designing, you can come up with an option that is combined with the design of the house and the landscape of the site. This is possible, among other things, due to the abundance of different colors of facing bricks and corrugated board. Other design advantages include:
- the strength of the profiled sheet, its ability to withstand strong winds and mechanical stress;
- the ability to design an option with low financial costs;
- protection of the site from unauthorized intrusion and from prying eyes;
- resistance of the flooring to UV rays and corrosive processes (provided by a polymer coating);
- ease of replacement of sections if necessary;
- resistance of the profiled sheet to fading in the sun, as well as to the action of moisture;
- long service life - the structure can last more than half a century.
The process of building a fence is quite long and requires a number of skills. Under the structure, you will need to build a strip foundation. You also need to be able to work with welding and brick laying.
Material selection
Having decided to make a fence from corrugated board with brick pillars, you need to purchase a sufficient amount of materials. Supports are made of facing bricks. A metal reinforcement - a pipe or a corner - will be mounted in their cores. Profiled sheeting can be taken with a single or double-sided polymer coating or galvanized. Products with a layer of plastisol are most resistant to precipitation.
You should pay attention to the marking of the profiled sheet. Products marked with the letters "НС" are optimal for making a fence. Load-bearing coatings that can withstand the highest wind loads are intended for roofing. Wall profiled sheet is used for wall cladding; it may not be wind resistant enough to be mounted on a fence.
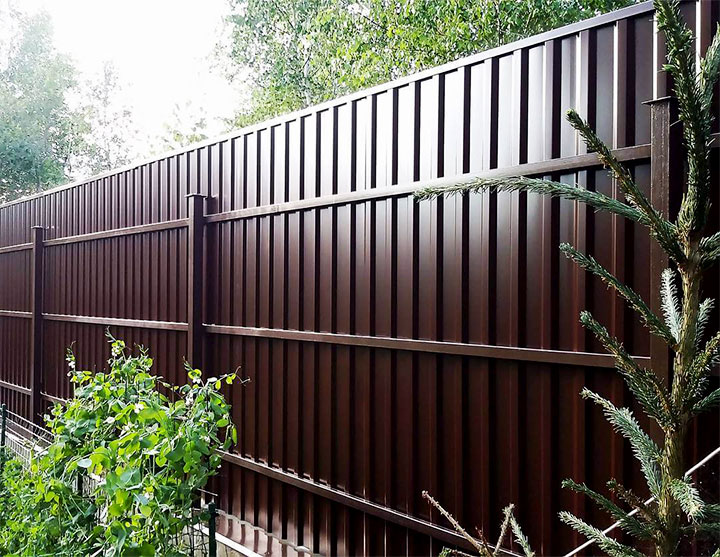
The height of the wave is also taken into account. The larger it is, the better the material can withstand strong winds and mechanical stress. Suitable ranges for the value of this parameter for the fence are 1-2.1 cm. A large height is also allowed, the quality of the structure will not deteriorate from this, but the purchase of such a profiled sheet requires large expenses. For products with a low wave, it is necessary to install an additional horizontal log in the middle part to increase the wind resistance. For a sheet with a value of 2.1 cm, two logs above and below are enough, on which the flooring is attached.
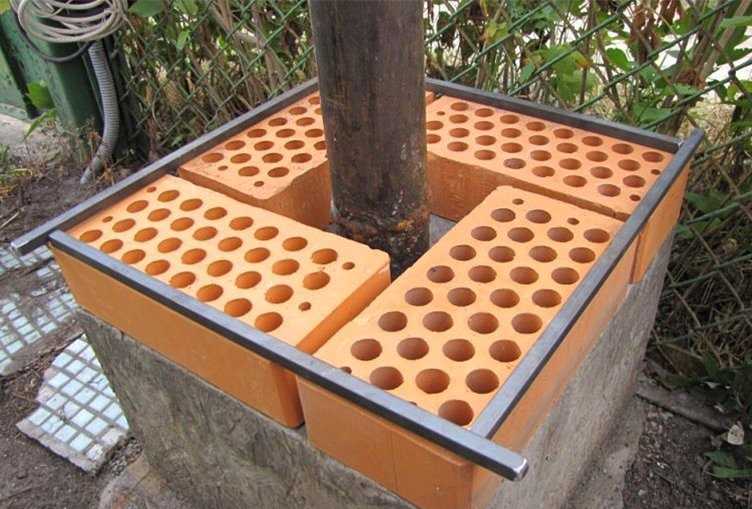
Before you start brickwork, you need to weld embedded elements (pins or plates) to the center vertical pipes. They are needed for attaching horizontal lags to them, to which the sheets will be attached, as well as wickets and gates. For each of these elements, one mortgage is welded (for lag - 2, one on each side). The thickness of the plates is the same as that of the seam. If the mortgage is thicker, the bricks are trimmed with a grinder.
Before starting work, you will need to prepare a dimensional drawing, which shows the main structural elements. The diagram should show the installation locations for gates (sliding or swinging), wickets, forged and other decorative details.
Do-it-yourself fence installation
It is recommended to carry out work in the summer. A strip foundation is arranged under the fence. It can have the same thickness along the entire perimeter or alternate wide (under the posts) and narrow (under the profiled sheet) sections. In the second method, the concrete mix is consumed less, but the procedure for assembling the formwork will be more difficult. The minimum tape width is 0.25 meters. If you make it constant around the perimeter, the pillars will be small.
To improve resistance to heaving forces that tend to push the foundation out of the soil, it is made expanding in the lower part. If there are significant differences in elevation on the construction site, the tape can be broken in stepped fragments in order to reduce the consumption of concrete. For example, under the posts (due to their greater mass), the foundation is laid to the depth of freezing of the soil, and under the flooring - 0.3-0.5 meters above this mark. Fragments of the stepped foundation are not connected to the overall structure. This is due to the fact that the buoyancy forces act unequally on areas with different depths. If they are combined, the fragments located above take a large load, which leads to deformation of other segments and the destruction of the foundation. This poses the greatest danger for the area where the supports are located, to which the gate is attached.
Having decided on the design and dimensions of the foundation, you need to dig a trench of the appropriate dimensions. In the future, step-by-step instructions for carrying out work looks like this:
- The formwork is being assembled from half-edged planks. They do it right in the trench. Before placing the boards there, you need to make holes in them with a drill in advance. It must be remembered that after pouring the concrete mixture, it will no longer be possible to straighten the structure. The boards are fixed with brick struts to compensate for the foundation pressure.
- The reinforcing frame is assembled on the ground and then assembled into the formwork. Rods with a cross section of 1 cm are used. They must be immersed in concrete at least 3 cm on all sides, otherwise they will corrode over time.
- Installation of vertical steel supports is in progress, serving to strengthen the brick pillars. They are lined up and fixed with boards.
- The concrete mix is mixed and poured into the formwork, as well as inside the vertical supports. After that, the surface is covered with polyethylene to prevent drying out. It will be possible to continue work in a week, when the concrete has settled.
- The pillars are laid, while in one day they must rise (alternately) to a height of 0.5 m. The space between the support and the bricks is filled with masonry mortar. The structure is reinforced with a reinforcing mesh. When the pillars are ready, covers are installed on top of them to protect the end parts from moisture. If dyed products are used, it is better to choose those with mineral pigment present.
- Install horizontal and vertical metal supports on which the profiled sheet will be attached. For longitudinal logs, a professional pipe with a section of 2x4 cm and a wall thickness of 2 mm is suitable.
The sheets are marked for self-tapping screws. They are fastened with an overlap through one wave. For installation, use an electric drill, set at low speeds, and galvanized self-tapping screws for the roof, equipped with rubber pads.


