Having your own home cellar is convenient and practical. Especially the advantages of this structure are felt in winter, when you don't need to go out into the wind and cold to get supplies. Building the basement of a house with your own hands is a rather complicated undertaking, but with a competent approach to business, it is quite feasible. To achieve a high-quality result, you need to decide on the type of subfloor, materials and technology for the construction of an underground structure.
- Varieties and features of cellars
- Is it possible to make a cellar from the basement
- The advantages of a cellar located in the house
- Location selection
- Step-by-step construction guide
- Arrangement of the pit
- Erection of the foundation
- Walling
- Floor installation
- Floor
- Ventilation
- Ladder and doors
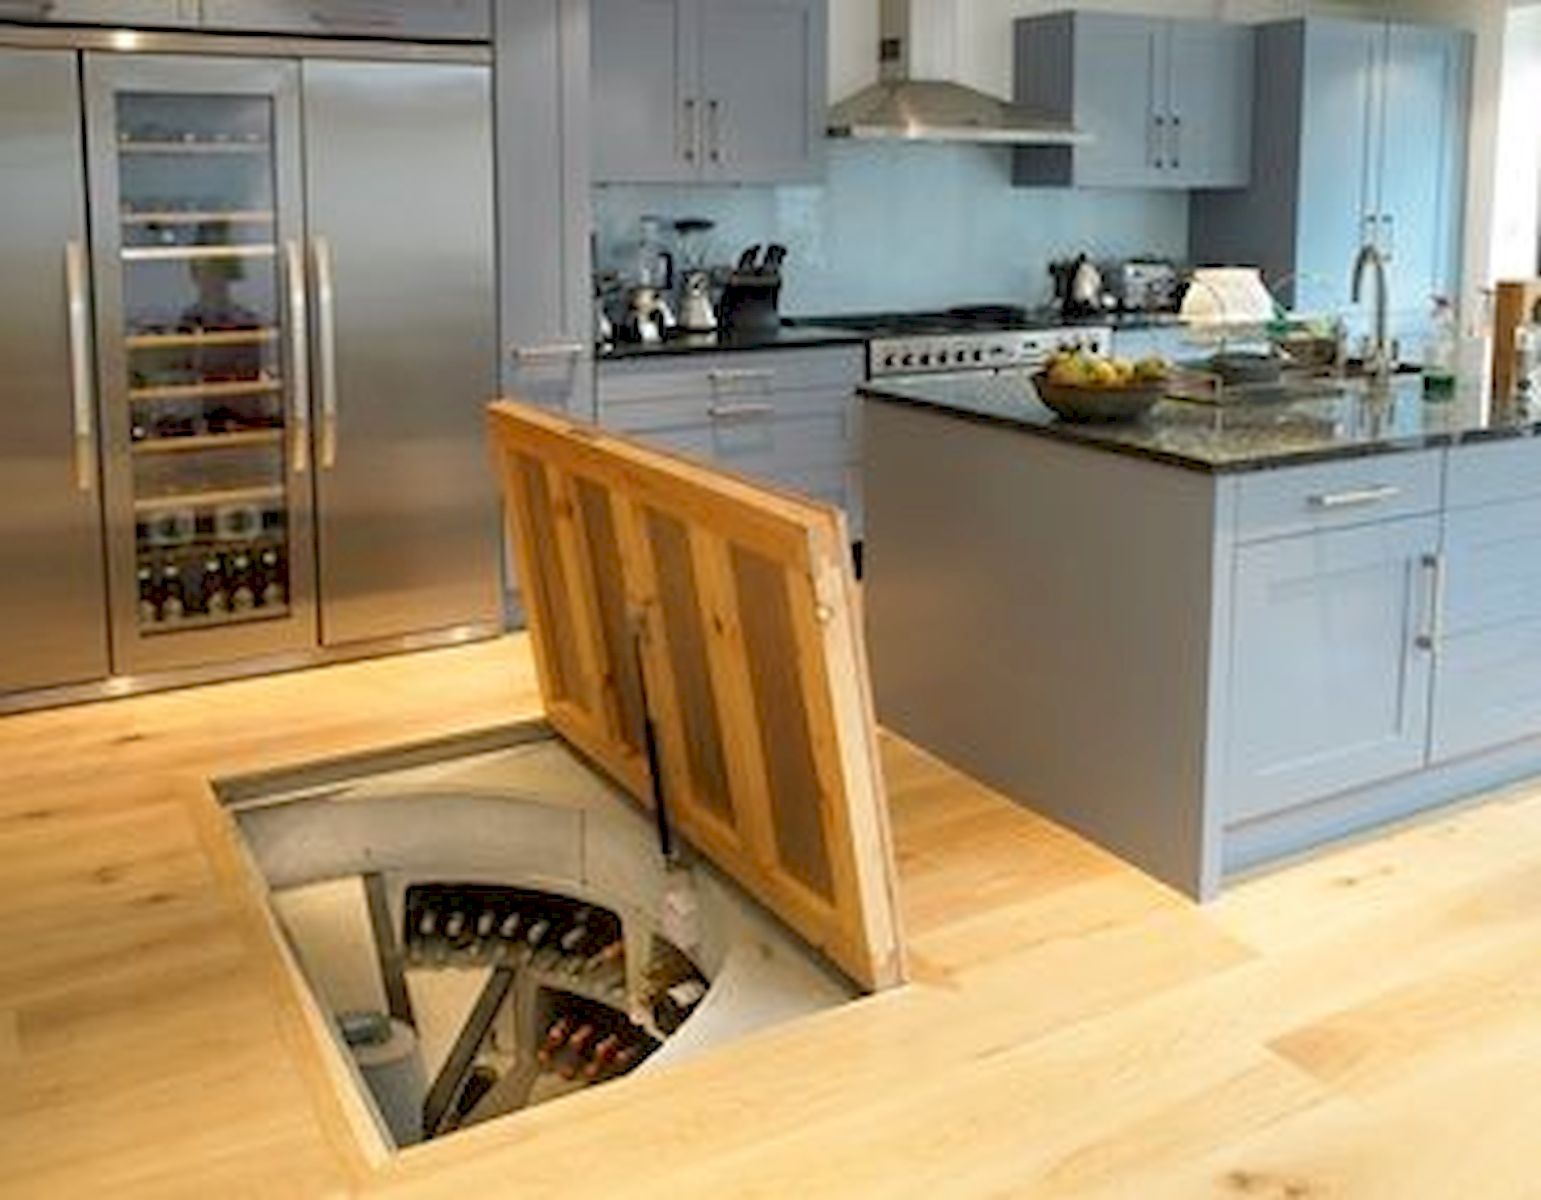
- Luke
- Wiring and lighting
Varieties and features of cellars
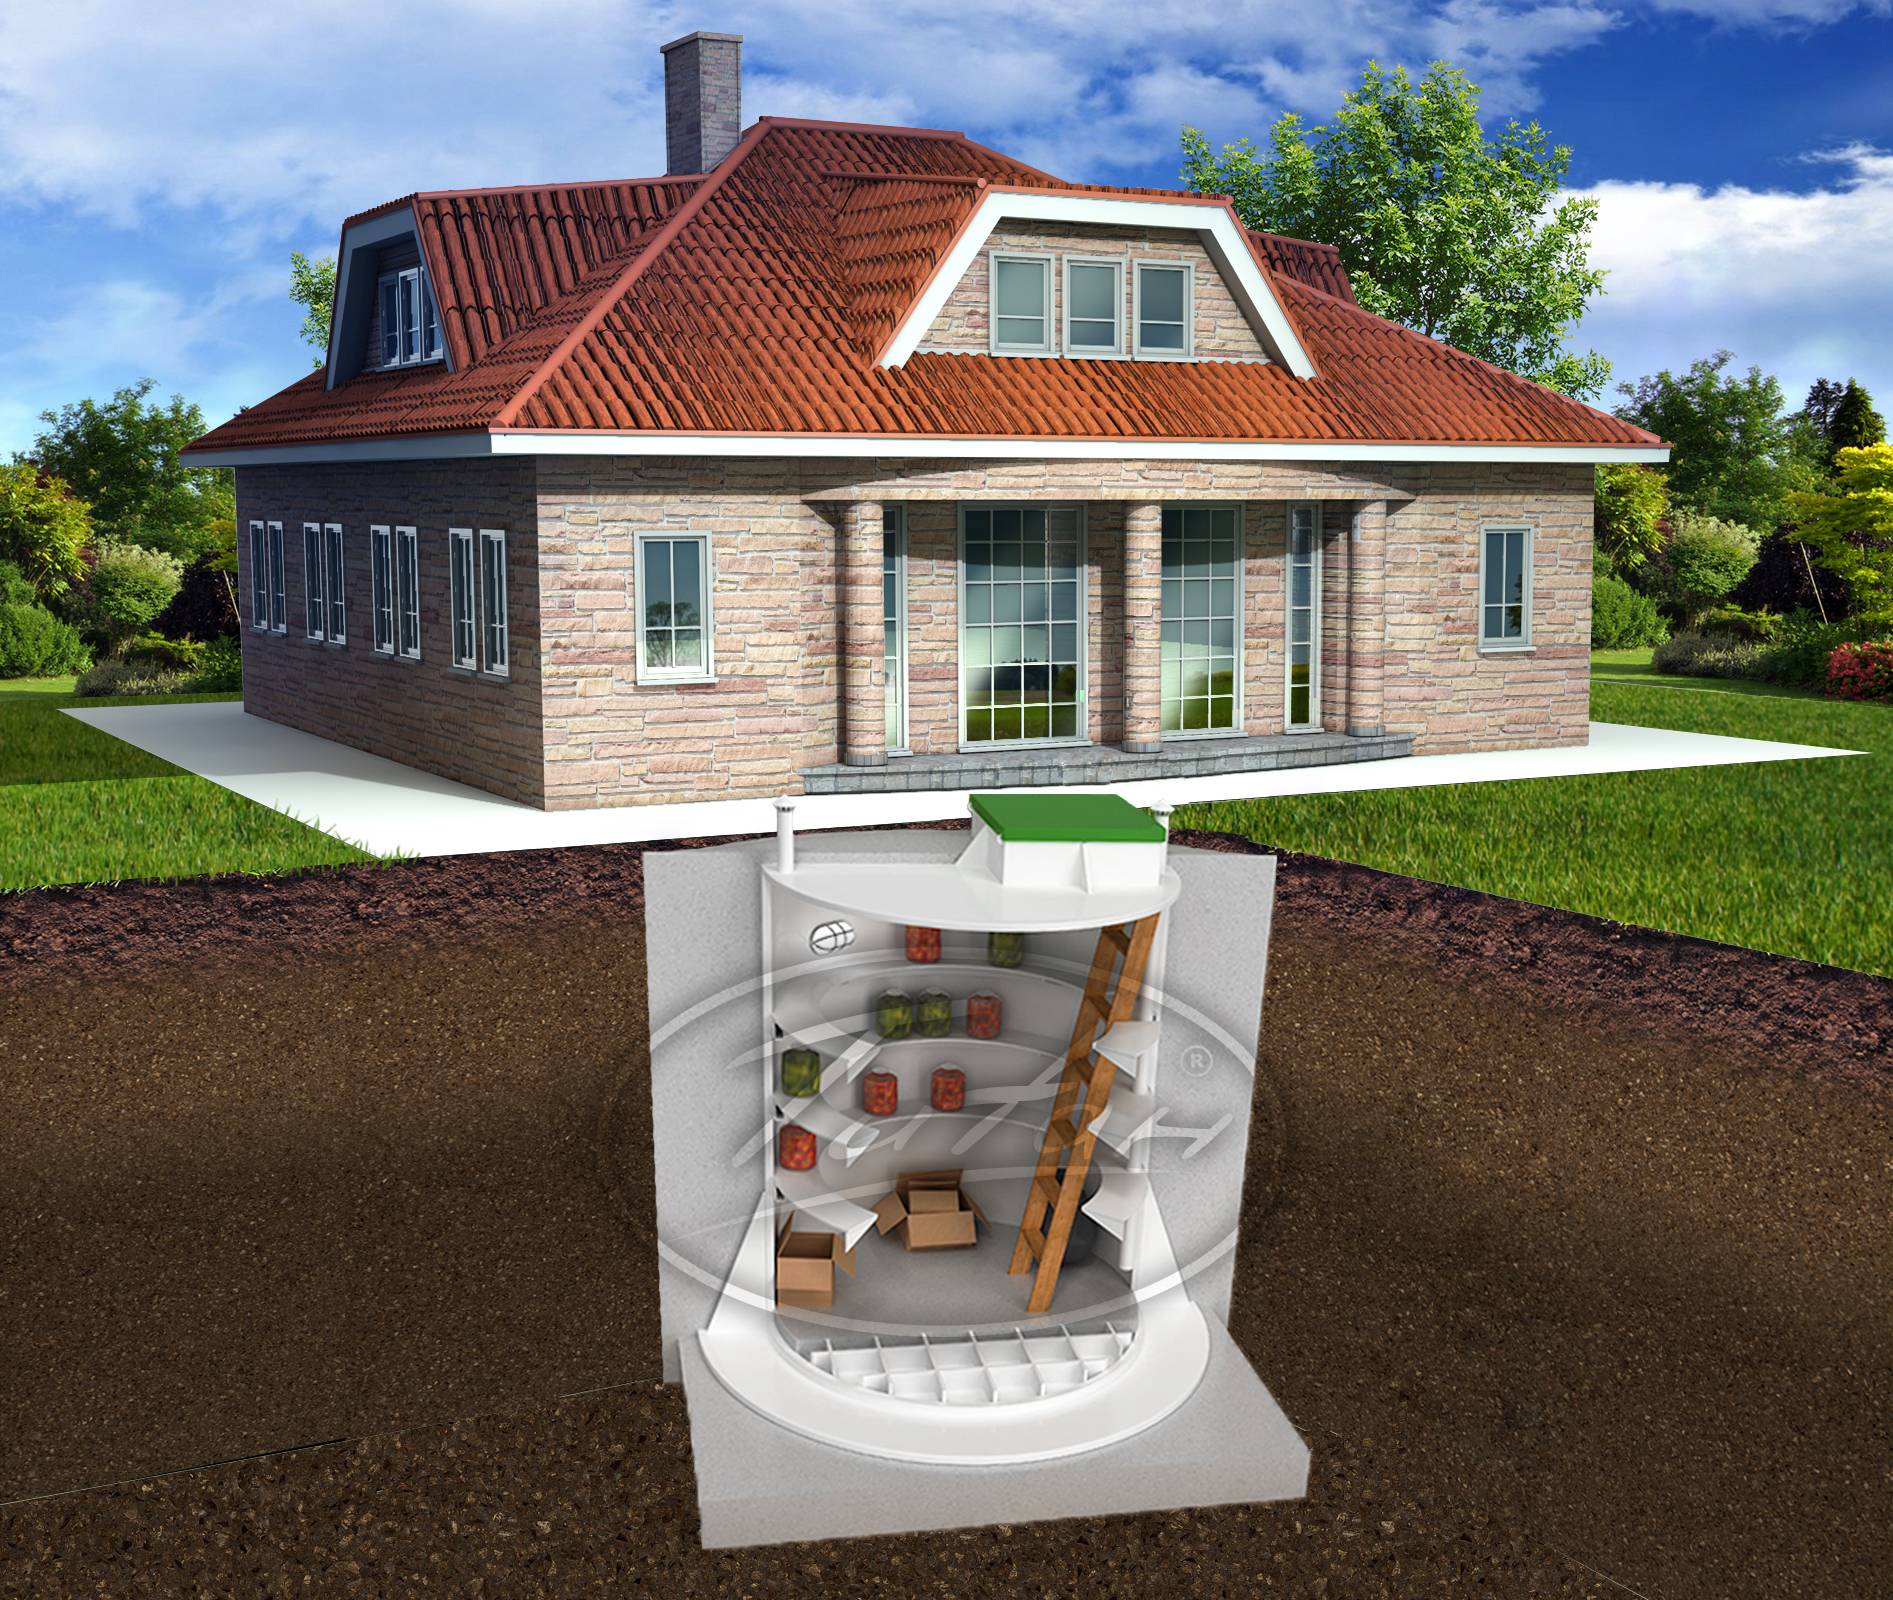
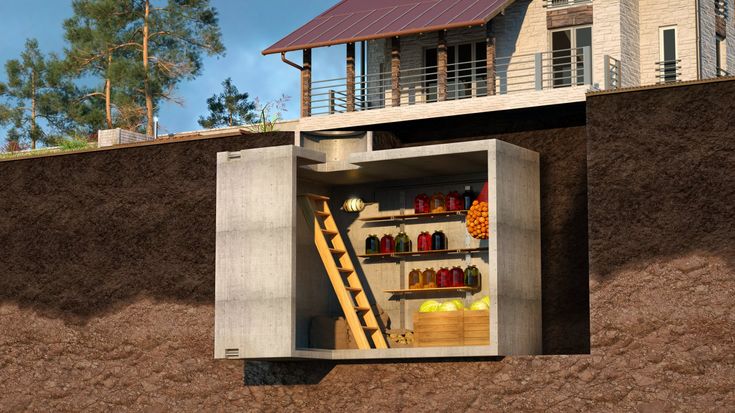
The cellar in the house is a structure located under the building, equipped for long-term storage of food. Its creation can be carried out at the stage of building a building or during its operation. The result in both cases is the same, only the sequence of work is different.
There are such types of cellars under the house:
- Earthen. The floor is reinforced with rubble and covered with boards. This ensures dryness and a constant temperature all year round.
- Stone. The walls and floor are laid out of blocks of limestone on a clay mortar with the addition of chaff and a small amount of lime.
- Semi-recessed. It is done in areas with a high level of groundwater. The base is lowered by 100-120 cm, and the top is brought out into the basement tier.
- From reinforced concrete rings. It is used in situations where interference with the foundation of the house can cause it to weaken. Rings of 200 cm are gradually dug in until they sink to a depth of 200-300 cm.
- From the old bath. The product is installed in moist soil. Preliminary measures are taken to insulate the container.
- Iron box. Such structures are used when installing buildings on pile, strip or slab foundations located on wet ground.
Each technology has its own characteristics, pros and cons, the choice is made after analyzing and assessing a specific situation. Even a small home cellar will help keep vegetables, fruits and pickles fresh for a long time.
Is it possible to make a cellar from the basement
To equip a cellar in the basement of a private house, you need to perform a number of manipulations that require a little time and effort. Initially, the basement is conceived as a dry and warm room. Such conditions are not suitable for greenery and conservation.
To make it cold and humid in the underground, you need to do the following:
- Turn off the heating completely or in the part where it is planned to expand the existing cellar. It is better to immediately remove the extra radiators and pipes, putting plugs in their place.
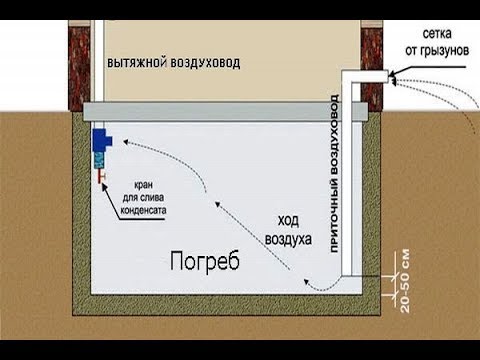
- Provide effective ventilation. To equip the flow of fresh air, you need to drill a hole in the lower part of one wall, and from the outside, bring a plastic pipe with a diameter of 100-150 mm to it.
- Insulate the hatch and doors if there are two entrances to the underground. For this, it is better to take foam or extruded polystyrene.
To quickly cool the room, you can place containers with ice in it or install a mobile air conditioner for a while. Then you need to ensure that the hatch to the subfloor is constantly closed, with the exception of ventilation procedures.
If you plan to equip a basement and a cellar under the house, the room is divided in half by a partition.Walls can be made of timber, but it is cheaper to build a structure from waterproof drywall with basalt wool located inside the frame.
The advantages of a cellar located in the house
To build a cellar in a private house, you will have to make an effort, spend time and money, but all this ultimately pays off in terms of comfort and finances.
The advantages of this solution:
- Safety of supplies. They can be stolen from the street cellar, in the house such a possibility is almost impossible.
- Products are at hand.
- Savings on the purchase of household appliances. There is no need to purchase expensive refrigerators and freezers.
- Preservation of usable area on the site. It can be used for flower beds, lawns and a host of other useful structures.
- Maintaining order in the rooms. No need to clutter the kitchen and balcony with numerous crates of provisions. Everything is neatly folded in one place.
You can make a high and roomy basement under the house with your own hands from scratch without the involvement of hired workers. For work, a set of household tools that are in every household is quite enough.
Location selection
The underground storage should be at least 5 m² in area to ensure freedom of movement between racks and containers. The maximum size is determined by the needs of the owners. Usually 8-10 m² is enough to meet the needs of a large family.
The place should be chosen so as not to carry food to the place of cooking throughout the house. It is not a good idea to install a hatch in the bedroom, living room and nursery. Remains the kitchen. It is convenient and practical in all respects, the size of the subfloor is quite suitable. You can make an entrance on any area free of furniture. The best option is at the wall farthest from the entrance. This location is convenient and safe.
After drawing up a basement layout, you need to decide on the materials.
The selection here is as follows:
- brick;
- reinforced concrete;
- a natural stone.
The supporting structures of an underground structure must be durable, tight, durable, resistant to moisture and fungus.
Step-by-step construction guide
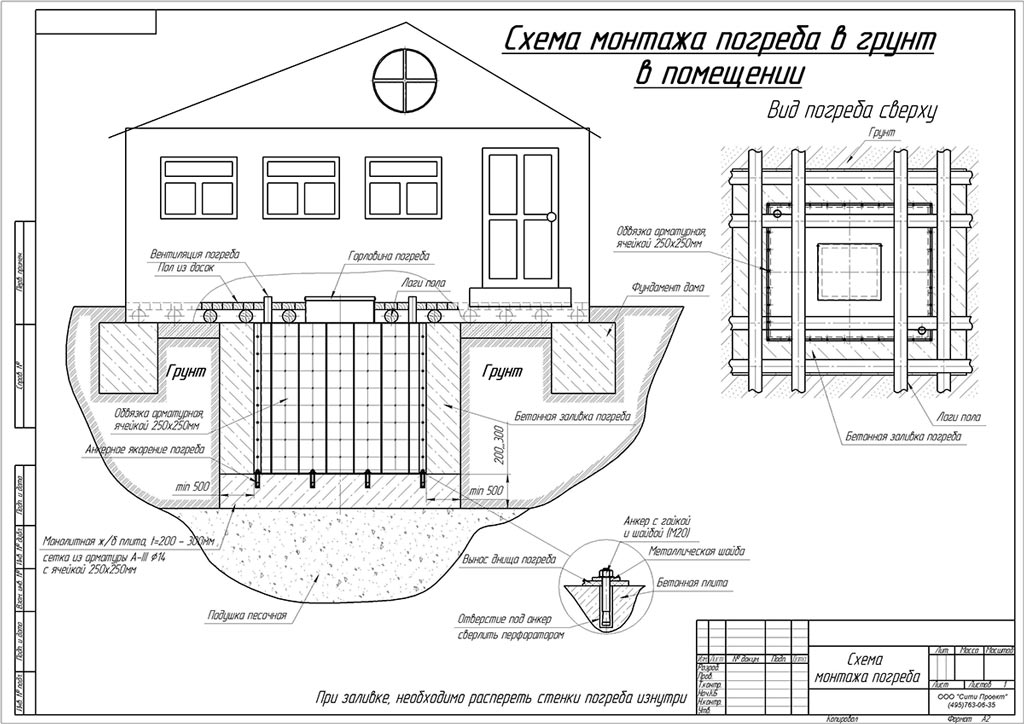
The initial stage of construction is design. On the basis of drawings and diagrams, an estimate and a step-by-step description of each stage of the upcoming work are drawn up. After that, the purchase of materials and the preparation of tools are carried out. The arrangement of the subfloor involves excavation and the handling of solutions. It is recommended to carry out this process in warm and dry weather, strictly following the plan.
Arrangement of the pit
This is the most difficult stage and requires a lot of effort. You can ease your own lot by renting a portable excavator. The selected soil does not need to be rushed out of the yard. It may well come in handy for landscape design. When pulling a pit, you need to strengthen the walls so that they do not crumble as they deepen. For this, boards, chipboard panels, steel nets or lattices with a fine mesh are used. If piles are installed, the nearest support should be at least two meters.
Erection of the foundation
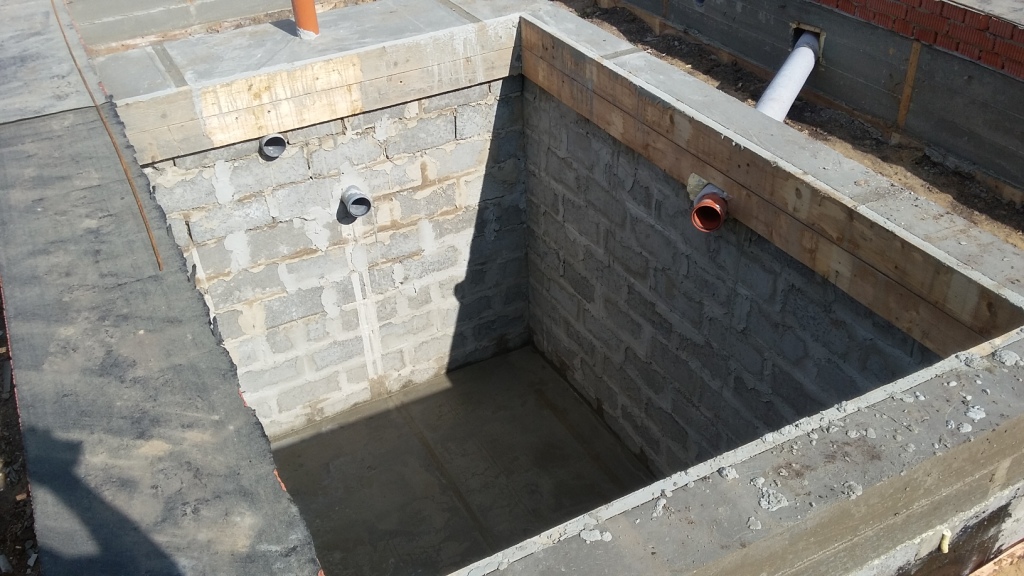
An earthen foundation is attractive in terms of ease of arrangement, but there are too many disadvantages in such a solution. Rodents, insects, pathogenic microorganisms will penetrate through the soil into the subfloor, grass and shrubs will germinate. Better to spend money and build a concrete floor.
Installation sequence:
- Laying geotextile fabric.
- Backfilling of fine gravel and sand. Wetting, leveling and tamping the pad.
- Laying waterproofing. Roofing material or dense cellophane is used. The joints are glued together.
- Assembling and securing the reinforcement cage. It is better to choose a spatial version of two gratings at a distance of 5 cm.
- Preparation and pouring of concrete into the mold.The minimum board thickness is 10 cm. The mortar is compacted and leveled. After setting, it is covered with foil or cloth.
It takes 3-4 weeks for concrete to gain strength.
Walling

The optimal solution is to create concrete monolithic structures. The walls are erected in stages, layer by layer is poured, and the formwork and frame are gradually built up. So you can easily make walls 250 cm high in 5 days, pouring 50 cm of mortar per shift.
Floor installation
The structure is made in the form of frame panels with filling of voids with mineral wool with a thickness of at least 10 cm. If the floor is at the same time the floor of the first floor, it is preliminarily insulated from the lower side using waterproof materials.
Floor
Already the concrete slab itself may be a floor, but the coating will crumble and dust. Concrete can be hardened and polished, covered with tiles, iron sheets or polymer tiles. The choice depends on the taste of the owners.
Ventilation
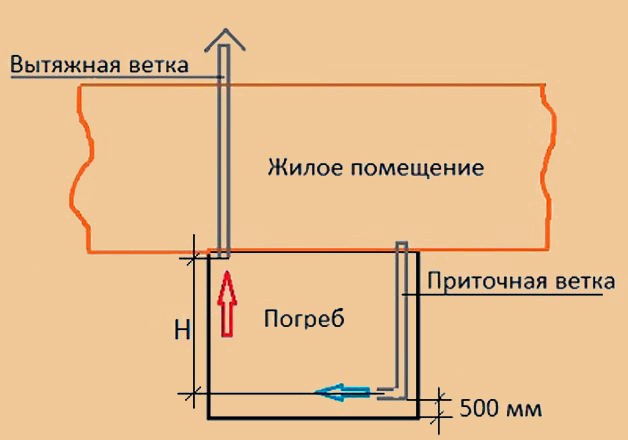
It is advisable to install ventilation even at the stage of wall construction, so as not to subsequently carry out labor-intensive earthwork. In the process of erection, pipe sections are laid in the formwork. Air channels should be passed through them before backfilling with earth. If necessary, a blower or an exhaust hood is installed.
Ladder and doors
Doors must be made with internal insulation and a seal around the perimeter. It is necessary to provide a lock, internal and external bolt. Ladders can be spiral or marching. In the second case, you should not make the slope steeper than 45 degrees. They need to be installed right next to the wall.
Luke

The hatch is completely sealed. The opening system is selectable manual or mechanical with a swing or retractable sash movement option. The finishing is applied after the end of the installation.
Wiring and lighting
Taking into account the humidity of the room, its electrification is carried out with direct current of 12-36 volts. Laying of communications is carried out in plastic corrugated tubes, switches and sockets are selected in a waterproof design.
All cellar surfaces are subject to waterproofing. It is better to do it from the outside of the structures. If this moment is missed, you can take advantage of penetrating fluids by applying them from the inside.


